
Welcome to the AirBeam for OSX Online Help
AirBeam streams live audio and video from the cameras of iPhones, iPods, iPads and Mac computers. You can watch the stream remotely in a browser or with another instance of the AirBeam app.
To use this computer as a camera device, switch to the camera tab. Other devices running AirBeam on the same local network will automatically discover this camera. Camera mode is only available with the Pro Version of AirBeam and requires OSX 10.9 or later.
To use this computer as a monitor device, launch AirBeam on a second iDevice or Mac and switch it to camera mode. If on the same local network, it will automatically appear in the monitor window.
Select one of the links to jump directly to a specific help section.
Monitor Mode
Camera Mode (only AirBeam Pro)
Recordings View
Preferences
Monitor Mode
Monitor-Mode is selected by choosing the ‚Monitor‘ button in the left bar of the main view. In monitor mode AirBeam uses Bonjour to search the local network for active AirBeam-cameras. While searching, the scanning animation is shown. Alternatively you can connect a camera manually by address and port number. To do so use the „+“ button in the lower right corner of the monitor window.
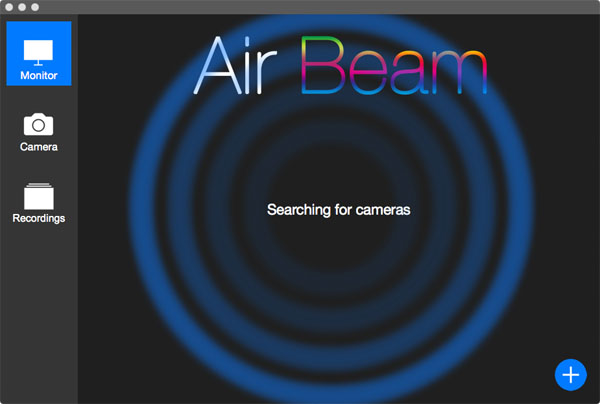
Monitor Mode searching for cameras
For each camera found, a thumbnail image is shown with a preview of the current camera image. The text at the bottom of the preview image shows the camera’s name. The preview image is updated once a second. If more cameras are discovered than fitting into the AirBeam window, the previews can be scrolled up and down. To watch the camera and listen to the audio, click the thumbnail image and a monitor window for the camera will open.
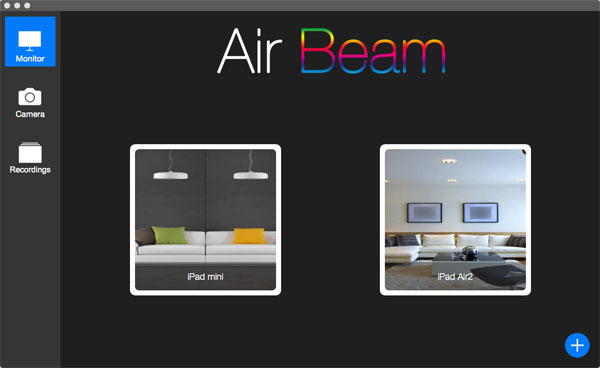
Previews for discovered cameras
The monitor window shows the live stream from the camera and starts audio playback when activated on the camera. Several controls are available to control the camera remotely:
- Camera controls on the bottom to start recording and to capture still images. The microphone button activates the two way audio so that you can talk to the camera device.
- Motion detection indicator and threshold slider on the top. Press the button to turn motion detection on/off.
- Audio detection indicator and threshold slider on the top. Press the button to turn audio detection on/off.
- A battery indicator in the top right corner to shows the charging status of the camera
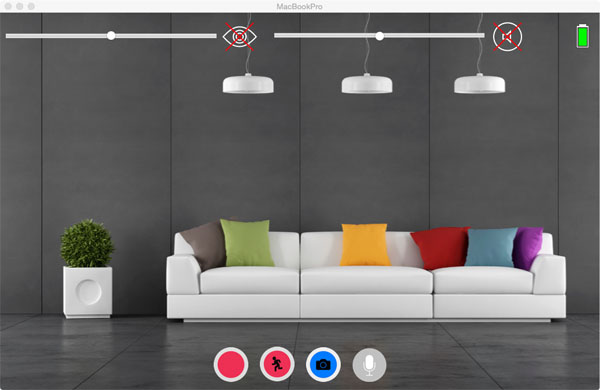
Monitor Window to follow and control the camera
Camera Mode
Camera Mode is activated by choosing the ‚Camera‘ button in the left bar of the main view. It is only available with the Pro Version of AirBeam for OSX. As soon as the camera is started it can be discovered by other AirBeam instances on the same local network. Several buttons are available to control the camera:
- The buttons on the bottom of the screen are the recording controls. The left button starts a video recording, the right button captures a photo and the middle button starts motion controlled recording.
- The green Wi-Fi icon on the bottom right indicates that the camera has can be discovered by others on the local network. It turns red when sharing failed for some reason. By clicking the icon a message box with the detailed camera address opens up.
- The slider on the top left indicates the current motion level and can be used to adjust the threshold for motion detection. You can turn motion detection on/off by pressing the button next to the slider.
- The slider on the top right indicates the current audio level and can be used to adjust the threshold for audio detection. You can turn audio detection on/off by pressing the button next to the slider.
- The green text on the top shows the URL for browser access to the camera. Enter this URL into a browser on the same local network and you will be able to watch and control the camera with your browser.
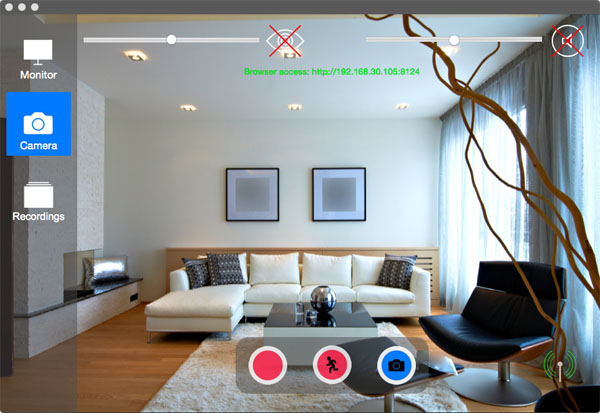
Camera Mode
Recordings View
The Recording View is selected by choosing the ‚Recordings‘ button in the left bar of the main view. It is only available with the Pro Version of AirBeam for OSX. The recordings view shows the contents of your local recordings folder (see preferences). Videos and still images are shown as small thumbnails in a grid view. To watch a video or image in full size, just double-click on the thumbnail. You can delete recordings by selecting them and pressing the ‚backspace‘ key on your keyboard.
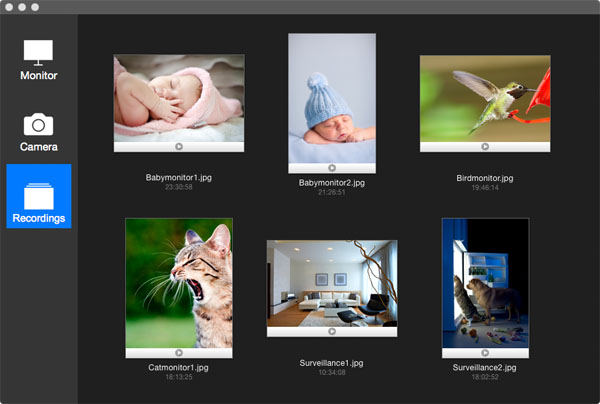
Recordings View
Preferences
You can open the preferences window by selecting ‚Preferences‘ from the AirBeam menu at the top of your screen. The preferences window contains several tabs to configure all detailed settings of AirBeam. For the basic version of AirBeam only the ‚monitor‘ tab is available.
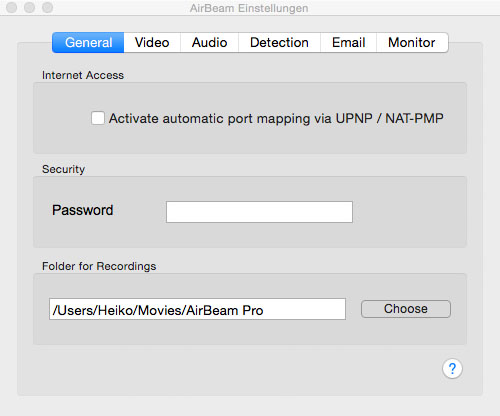
General Preferences (Pro version only)
- Internet Access: Activate port mapping if you want to watch your Mac’s camera connected to your Wi-Fi network at home from anywhere in the Internet. As long as your WiFi router support Universal Plug and Play (UPNP) or Apple’s NAT-Port Mapping Protocol, AirBeam will configure the required port mappings with your router automatically. If your router does not support UPNP or NAT-PMP, you can still setup port forwarding manually in your router’s setup.
If port mapping is activated, it is recommended to configure a password to prevent other users from watching your camera. - Security: You can set a password to prevent other users from accessing your AirBeam camera. You will be asked to enter this password when you connect to the camera from another AirBeam app or via a web browser.
- Folder for Recordings: Allows you to set the folder AirBeam uses to store recordings. Please be aware that by default recordings are always stored on the camera device, even if started remotely.
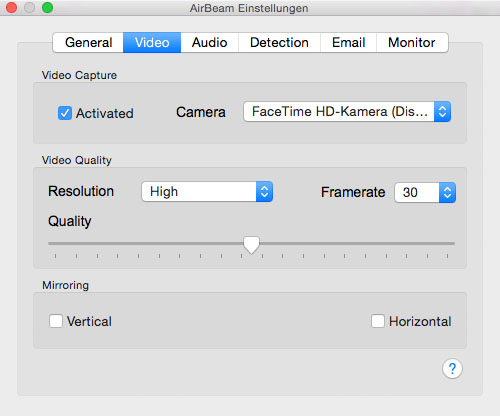
Video Preferences (Pro version only)
- Video Capture: Allows you to choose the camera device used for video capturing in case your computer is equipped with multiple cameras. You can also disable video capturing completely, if you want to use AirBeam only for audio monitoring.
- Video Quality: Allows you to adjust the quality settings for video streaming. You can switch between different resolutions supported by your camera and the maximum rate at which video frames will be captured and transmitted. The quality slider adjusts the compression ratio for the video frames. Slider to the right means higher quality and lower compression. Please be aware that a high overall video quality consumes high network bandwidth and will reduce the frame rate of the video playback.
- Mirroring: Activate mirroring if you want the streamed video to be flipped horizontally or vertically.
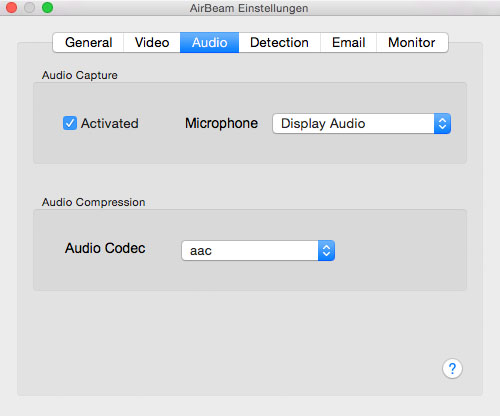
Audio Preferences (Pro version only)
- Audio Capturing: Allows you to choose the microphone used for audio capturing in case your computer is equiped with multiple microphones. You can also disable audio capturing completely if you want to use AirBeam only for video monitoring.
- Audio Encoding: Choose the audio codec best suited for your application and network connection. PCM is recommended in case of a good WiFi connection. For streaming over cellular 3G it is recommended to choose a low bitrate codec like AAC.
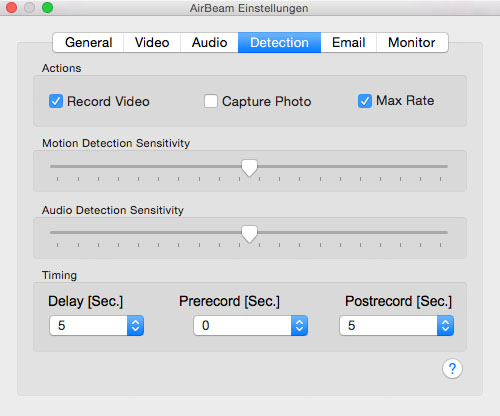
Detection Preferences (Pro version only)
- Actions: Selects the action to take in case the detection is triggered. Possible actions are to record video or to capture a photo. ‚Max rate‘ sets the camera frame rate to maximum as soon as the recording starts.
- Motion sensitivity: Adjusts the overall sensitivity for motion detection. Slider to the right means higher sensitivity.
- Audio sensitivity: Adjusts the overall sensitivity for audio detection. Slider to the right means higher sensitivity.
- Timing: Adjusts the timing for recording. ‚Delay‘ waits for the given time until the detection is armed. ‚Prerecord‘ records already video before the event. ‚Post record‘ continues recording for the given time after the event.
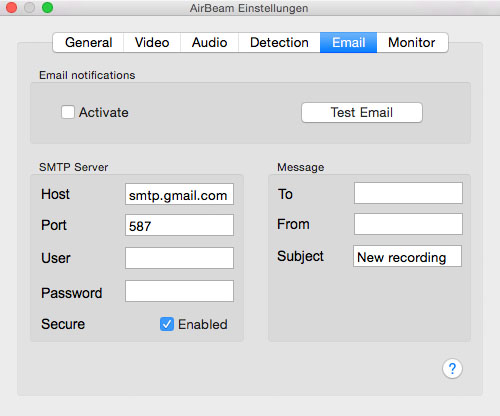
Mail Preferences (Pro version only)
- Activate: Turns email notifications for detected motion or audio event on or off.
- Test mail: Sends a test email to verify whether your settings are correct. If not, an error message will be shown.
- SMTP Server: The SMTP server and account information that is used to send messages. Please check with your email provider for the correct settings.
- To: The target address your email is delivered to.
- From: The source address of the delivered email. If left empty, the SMTP user name is used by default.
- Subject: The subject of for the email.
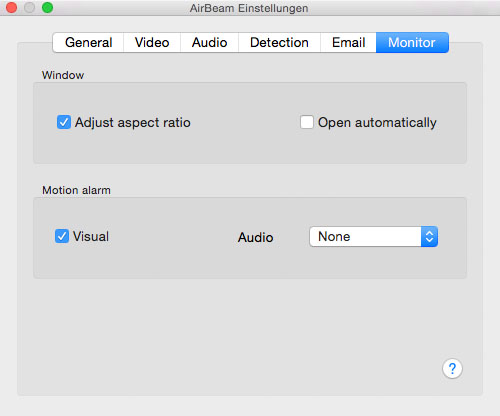
Monitor Preferences
- Adjust aspect ratio: If activated, the aspect ratio of the monitor window is automatically changed when the camera device is rotated or the resolution changes.
- Open automatically: When activated a monitor window is opened automatically when a new camera device is discovered.
- Motion alarm: Chooses how detected motion or audio events are notified on the monitor side. Visual will highlight the device in the monitor window. Audio will play back a sound.